Posted on February 14, 2025 06:09
How to Format a Book Professionally in 7 Simple Steps
So, you've finished writing your book, and your editor has whipped your story and prose into shape. Now it's time to format that manuscript into a beautiful book that readers will want to devour from cover to cover.
In this post, we’ll show you how to use the free Reedsy Studio to prepare your book for publication. It’s not as hard as you might think — particularly for how important it is to your sales and readers.

Why book formatting matters
Imagine that you’re reading this article and find yourself distract ed by a random sp ace where it shouldn’t be. Or perhaps the font is inconsistent. Or a paragraph break
disrupts the reading experience entirely.
Given such a reading experience, you might find it a bit difficult, or nigh impossible, to immerse yourself in said article — much less a book that’s two hundred pages long!
But that’s precisely the job of proper formatting: it ensures that the story you’re telling flows seamlessly on the page, allowing readers to stay immersed in your story instead of getting frustrated by layout issues.
For self-published authors, formatting is even more important. While it’s one of the steps of the publishing process that’s easiest for a self-published author to overlook, you can be doubly sure that it will stick out like a sore thumb to readers when it’s done wrong. And by the time readers notice something’s off, it’s already too late: your book will already be labeled as unprofessional next to a traditionally published one.
That’s why proper book formatting pays off. As for what exactly to pay attention to during the process, here’s a handy list.
The essential elements of book formatting
Contrary to popular belief, formatting a book involves more than a copy and paste in Microsoft Word and hitting the “Save as PDF” button! Below are the core elements involved in the process.
Font
No need to get fancy with the font you use in your book: industry-standard serif fonts like Garamond, Times New Roman, or Baskerville do the job just fine. (And when in doubt, just remember this golden rule of life: don’t pick Comic Sans!) As for size, the standard font for print books typically ranges from 11 to 12 points for body text, with larger sizes for chapter titles and headings.
Line spacing, margins, and indentation
These all impact the readability of your book. Line spacing, for instance, helps make sure your text isn’t crammed together or spread too far apart. Meanwhile, you never want your text to run too close to the edge of the page, which is where margins come into play. Finally, fiction and nonfiction books use first-line indentation (0.3” to 0.5”), while nonfiction books with lists or bullet points may rely on block formatting.
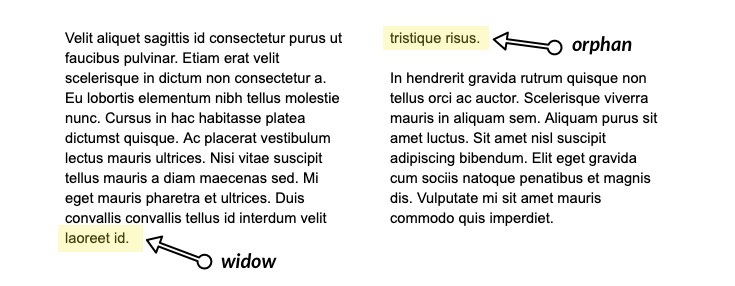
Widows and orphans
Nope, we’re not talking about orphans in the Oliver Twist sense. In publishing speak, a widow is a word (or small group of words) that sits by itself at the bottom of a paragraph or page, and orphans are words leftover from a paragraph on the previous page. Needless to say, you should try to avoid these to keep your text looking clean and professional.
Page numbering and header settings
If you’re formatting a print book, you’ll want your page numbers to start on the first page of Chapter 1 (not on your title or copyright pages). And, as you might already know from years of reading books, page numbers generally go at the bottom center or top right corners! Headers/footers, meanwhile, can include the book title, author name, or chapter title.
The difference between book formatting for print books vs. ebooks
Book formatting isn't a one-size-fits-all process. Because they vary so much in format, print books and ebooks require different formatting considerations.
- Print books have static layouts: once printed, the text does not change. So factors like font, margins, line spacing, and trim size are important because they permanently impact the presentation of the text on the physical page.
- Ebooks have digital layouts, which means that their text is responsive and reflowable across various screen sizes (from Kindle devices to smartphones). Unlike print books, ebooks rely on HTML-based formatting, and considerations such as page numbers aren’t needed because digital devices automatically generate them.
Now that you’re caught up on what goes into book formatting and why it’s important, here’s the good news: you can format your book in five minutes! All you need is the right writing app.
Reedsy Studio is known for being the only writing tool that can professionally format both print and ebook editions of a manuscript for 100% free. In the rest of this post, we’ll walk you through how to do so in only six simple steps. Before we begin, we of course recommend that you sign up to Reedsy Studio here.
If you're a visual learner, you can also follow along using the YouTube tutorial below. Otherwise, let’s start! (Formatting demo starts at 06:50)

How to format a book for publishing in 6 steps
1. Import your fully-edited manuscript
This step is pretty straightforward. Whether you've been using Microsoft Word, Google Docs, or another service, use the "Import Book" function on Reedsy Studio to import your manuscript.

To keep all your chapter breaks and headings, be sure to:
- Use "styles" for each chapter title and heading; or
- Use "chapter …" at the beginning of every chapter.
Once your manuscript is nestled comfortably into the editor, the formatting can kick off!
2. Format your chapter titles and paragraphs
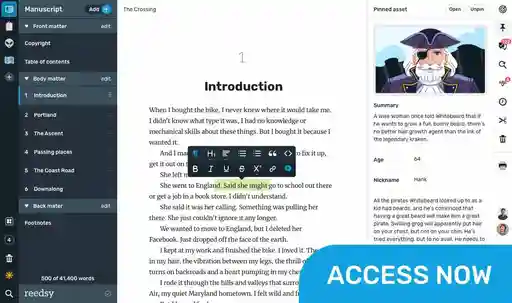
Reedsy Studio respects the existing formatting of your manuscript, which means that our software will retain elements like headings, links, and inline styles (italic/bold). Just in case, however, go through your book with a magnifying glass and make sure that your text (including your chapter titles) is formatted the way you envisioned.
To do this, simply highlight the text to pull up the smart formatting bar.

The paragraph styling options are:
- Default paragraph: your standard styling
- Three levels of headings to structure your content (mainly for non-fiction books)
- Two types of lists: bullet points and numbers
- Quotations

As you progress through your book, keep an eye out for widows and orphans, as we discussed earlier. You can avoid them by playing around with your line breaks — but note that this is only a consideration if you’re planning to publish a print book. For ebooks, it’s a matter out of your control since the text on a digital device is automatically reflowable.
3. Add images, endnotes, and page breaks
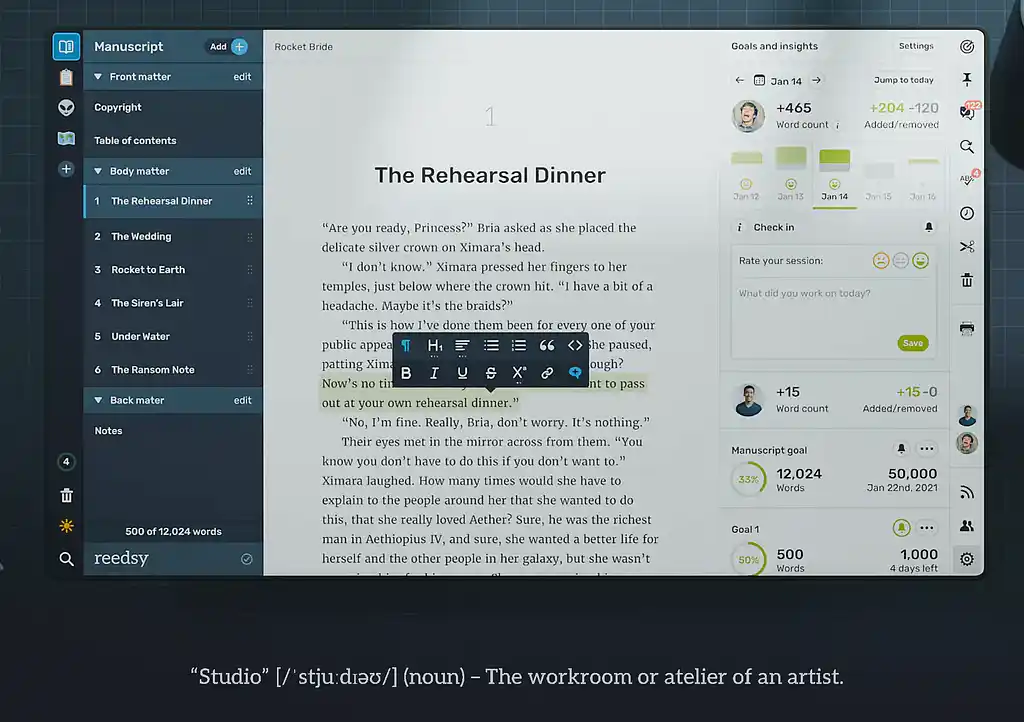
You’re almost done formatting your book’s interior! The final step is to add images, captions, or scene breaks (if you have them). To do this, simply navigate to the panel on the right-hand side of your Studio, and click the “Insert” button.

Images will show up like this:

And you will find your endnotes in a dedicated chapter at the end of your book for reference:

Note: Reedsy Studio will take care of your page numbering — so no need to worry there!
4. Set your table of contents and copyright page
Finally, let’s address your table of contents and all-important copyright page. In Reedsy Studio, you can manage your book's front matter elements (the parts of your manuscript that come before the actual content begins) in two sections: the copyright page and the table of contents.
The copyright page

On this page, you can manage your:
- Title
- Subtitle
- Pen name
- Edition number
- Year of publication
- Collaborators
- Publisher name and logo (if any)
- Copyright clauses
- ISBN number(s)
Note that you won’t need an ISBN for most ebook retailers, as they issue their own identifying numbers. For instance, Amazon uses the Amazon Standard Identification Number (ASIN) and creates a new one for free every time you publish with Kindle Direct Publishing (KDP). Similarly, Apple iBooks no longer requires an ISBN.
There’s currently a debate about whether or not ISBNs still make sense, and you can read more about it here. For now, you’ll need an ISBN if you’re planning on printing POD versions, and most POD services will provide you with one for free.
Table of Contents
This is where you can choose how detailed your table of contents will be. If you're writing a novel, you may only want to list the chapter titles in the table of contents. However, you can also choose to list your sub-headings as well (below).

At this point, your manuscript’s interior is taken care of, and now it’s time to focus on its exterior.
5. Upload your book cover
We can’t talk about a book’s exterior without talking about your book’s cover. Now it’s time to put a face to your story. To do so, click the “Manage” button on your book in the bookshelf of your Reedsy Studio. You’ll be taken to its “Settings” page, where you can upload your book cover.
Make sure you upload an image following the requirements of the ebook stores you use for distribution. For best results, we recommend your cover image use a ratio of 1:1.6 and measure at least 2500px on the longest side. But if unsure, check out our handy guide on choosing the right book cover dimensions.
Note that POD services will require a PDF with the full jacket and a separate PDF for the book’s interior for physical books. For the book’s jacket, we recommend working with a designer from the Reedsy marketplace who knows the requirements of different POD services and will be able to provide you with the right file.
6. Pick a trim size
We’re getting closer! Next, navigate to your “Exports” page in your settings, where the magic happens.
Here, you’ll be presented with two export options: either a print-ready PDF for those publishing print copies, or an EPUB for those publishing digitally.

For ebooks: download an EPUB file
EPUB files are compatible with the Kindle Store, Apple Books, the Kobo Store, Nook Press, Google Play, and NetGalley. If you’re only planning to sell ebooks, this is all you need to select.
For print copies: download a PDF file
The files created are currently compatible with most POD services (Lulu, KDP Print, IngramSpark, CPI, etc.). Unlike ebooks, your physical copy needs to be set to a trim size ready for printing. Reedsy currently offers a few different options, based on popular industry standard sizes:
- Pocket 4.25 x 6.87 in (10.80 x 17.45 cm)
- Reedsy 5 x 8 in (12.7 x 20.32 cm)
- Digest 5.5 x 8.5 in (13.97 x 21.59 cm)
- Trade 6 x 9 in (15.24 x 22.86 cm)
Here are a few pictures to give you a sense of what those different sizes look like. We recommend that you read this article on standard book sizes to understand which one is right for you:

7. Export your print and ebook files
Once you’ve selected your trim size, pick a professionally typeset template. You’ll have three choices:
- Reedsy: a modern theme typeset in Lato and Merriweather.
- Classic: a traditional theme typeset in Crimson, a beautiful old style type inspired by the work of designers like Jan Tschichold (Sabon), Robert Slimbach (Arno, Minion), and Jonathan Hoefler (Hoefler Text).
- Romance: designed for romance authors, this template is also typeset in Crimson, but with a decorative chapter title and ornament.

All three templates follow the industry’s best practices for typesetting, so you can’t go wrong with any of them.
And there you have it! You’re ready to hit the big “Export book” button now. Your moment of glory is only seconds away — all that’s left is for the editor to typeset your book and get it ready to be downloaded! Congratulations!
Head to Reedsy Studio and format your book for free in just a few seconds.
