Posted on October 07, 2024 14:34
How to Format a Book in Microsoft Word in 7 Steps
Microsoft Word has been many authors’ go-to writing software for decades. Its tried-and-tested interface and solid set of features have made it a trusted favorite for many. If you’re an author, these days, there are new publishing tools that are specifically made for novel writing and formatting.
But if you're sticking with the classic and want to format your book with good ol' MS Word, don’t worry — we’ve got your back! It might not be the newest kid on the block anymore, but Word is like a comfortable pair of shoes — reliable, and you know exactly what you're getting.
How to format your book in Microsoft Word:
1. Open a new doc and set your page and trim size in the layout panel.
First things first, you’ll need access to Word. You can buy Microsoft Office (a bundle that includes Word, Excel, and Powerpoint) as a one-time purchase for $149.99, but if you only need temporary access to Word to format your book, you can buy a Microsoft 365 subscription for $6.99 a month.
Once you have Word installed on your device, you can open up a fresh document and assign it any name you like. The next thing you’ll want to do is set your trim size, which refers to the height and width of the book’s pages. There are several standard book sizes in publishing, but the most common one for novels in the US is 6” x 9” (or 15 x 23 cm for non-US authors).
To set your page size, navigate to:
Layout > Page Setup > Size > More Paper Sizes
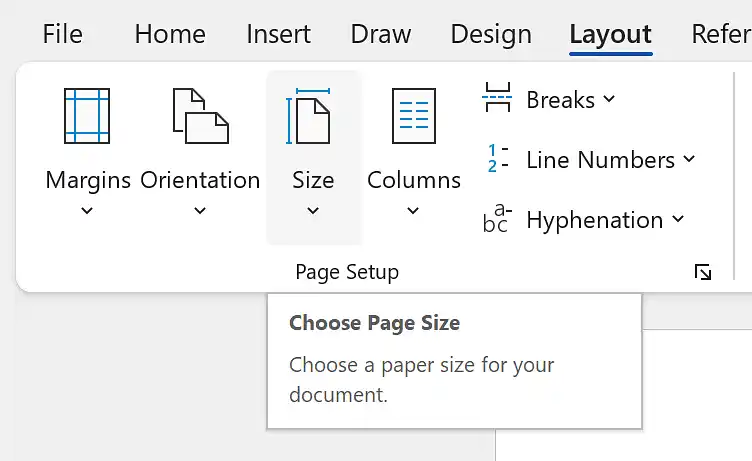
Enter your preferred Width and Height, set it to Apply to the whole document, and presto! You’ve set your trim size.
Next up, you’ll need to calculate your margins and gutter to prevent any awkward cropping incidents later on.
✍️ Unlike alternatives like Google Docs or Reedsy Studio, Word isn’t free. Microsoft Office (a bundle that includes Word, Excel, and PowerPoint) costs $149.99 to buy or $6.99 a month as part of an Office 356 subscription.
2. Calculate your margins and gutters
Your margins are the spaces between the text and the edge of the page. When your book goes to print, the pages will be bound together, so the inner edges near the spine will need extra space — this is where the gutter comes in. The gutter is the inside margin, and you’ll want to adjust it precisely to ensure that text doesn’t get lost in the fold of the book.
To set your gutter and margins, place your cursor in the main body of your manuscript, then go to:
Layout > Page Setup > Margins > Custom Margins
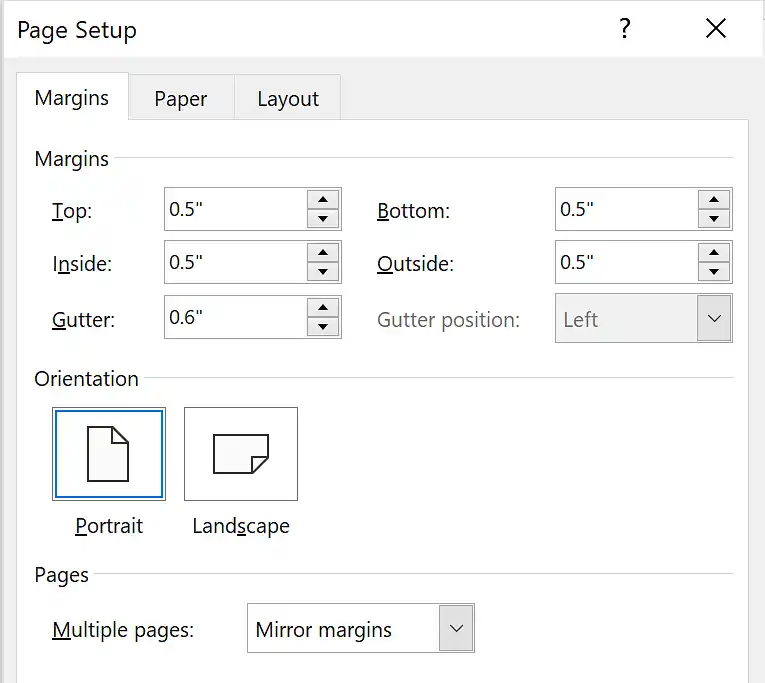
In the pop-up dialog box, select Mirror Margins to ensure that your left and right pages will have mirrored layouts, with the gutter on the inside edge of each page. After that, you can input your Margins and Gutter size.
For a standard US book size (6” x 9”), you’ll typically want a margin of 0.5 inches (around 1.3 cm) with a larger gutter to accommodate the fold near the spine. A good starting point is a gutter of at least 0.6 inches (around 1.5 cm). For longer books, increasing the gutter to around 0.75 inches (2 cm) can help ensure readability near the spine. If you’re unsure about what gutter size will work best for your book, consult your print on demand supplier — they will be able to tell you how big your gutter should be based on your page count.
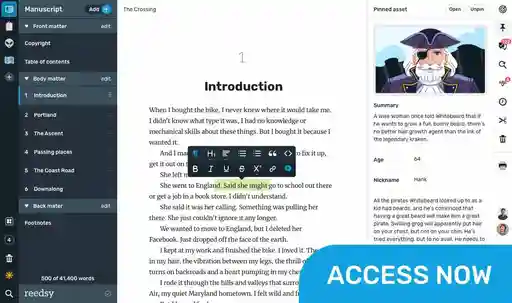
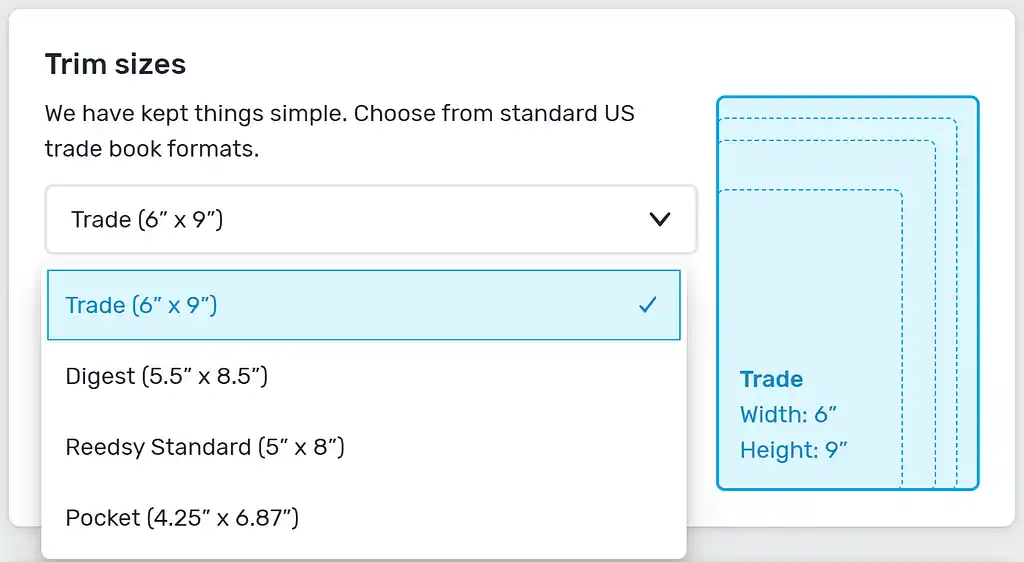
If setting your trim size and adjusting your margins in Word feels a little finicky, you have some other options! The process is completely automated with Reedsy Studio, a free all-in-one writing app made for authors, which comes with a range of different trim sizes and does all the typesetting for you, too.
Now, before you insert your manuscript into the doc, you should also customize your text styling to make sure it looks nice and clean.
3. Style your spacing, indents, and fonts
Most of Word’s default page settings will be applicable for a standard book layout, but it’s a good idea to double-check them. Let’s briefly go through them together.
Line Spacing
You can adjust your line spacing to improve readability. Line spacing of 1.5 is common in trade publishing, but sometimes, a bit of extra space enhances the reading experience. You can customize your line spacing by selecting Line Spacing Options. To do so, go to:
Home > Paragraph > Line Spacing
You can select 1.5 from here, or get as specific as you’d like by navigating to the Line Spacing Options menu.
Paragraph indentations
You can save yourself some time by setting up your document to automatically indent the first line of each new paragraph. Highlight the paragraphs you want to format, then right-click anywhere in your highlighted text and select Paragraph from the menu.
In the Paragraph dialog box that pops up:
- Under the Indentation section, navigate to Special;
- Select First Line from the dropdown menu;
- Set the indent size to your liking — typically 0.5 inches (1.3 cm) works well for most books.
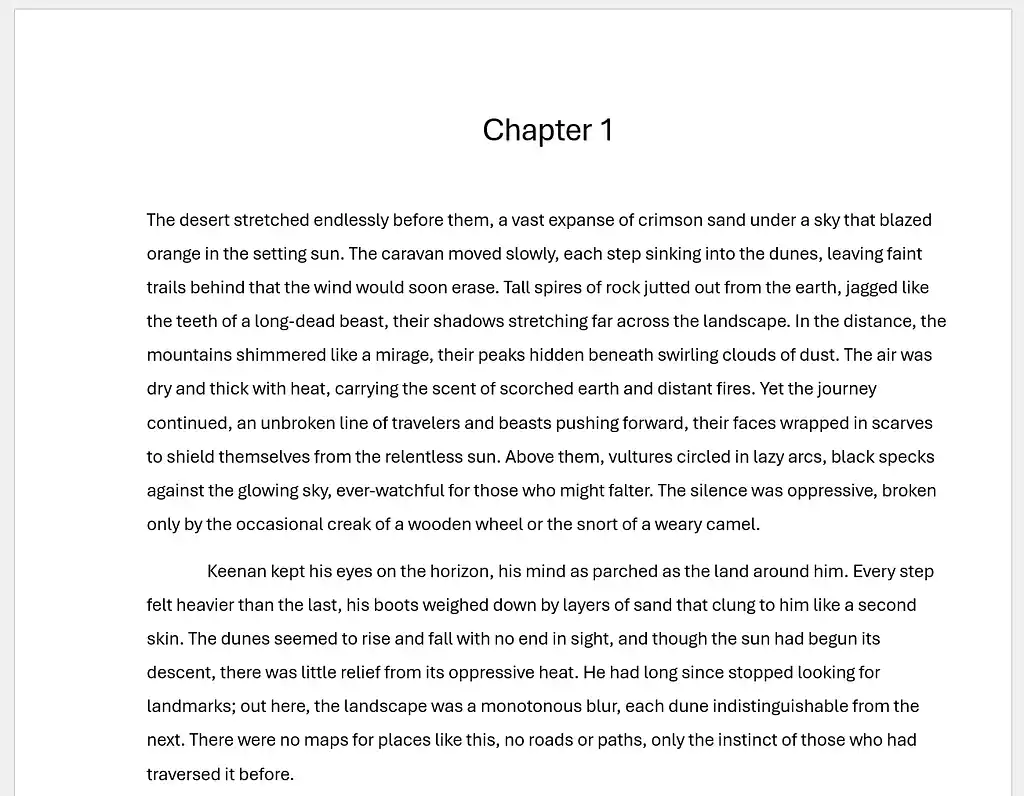
Click OK and voila! From now on, each new paragraph will automatically start with the indent size you’ve chosen, keeping your formatting tidy and professional.
Customize your font
Changing your font is straightforward — just hit Ctrl/Cmd + A to highlight your manuscript and select your preferred font in the Font group. Word has a wide range of free fonts for you to choose from; some of the most popular in modern book design include:
- Times New Roman
- Arial
- EB Garamond
- Georgia
- Lora
For your font size, Word’s default 11pt will likely do the trick, though you may prefer 10pt or 12pt, depending on the length of your manuscript.
Now is the time to copy and paste your manuscript into your document. To paste it cleanly without any odd formatting, press Ctrl/Cmd + Shift + V (or right-click and select "Paste without formatting").
Customize your chapter headings
To make your chapter headings stand out, you can use a different font from the rest of your manuscript. To do this, start by highlighting your chapter headings. You can hold down Ctrl/Cmd as you go through the doc to highlight multiple pieces of text at the same time. Once everything is highlighted, go to:
Home > Styles > Heading 1
From here, you can customize the font for your chapter titles as you see fit — you can adjust the font size, style (bold, italic), color, and other effects like all caps or small caps to give it a distinct look. Labeling each of your chapter titles as Heading 1 will be important for generating your table of contents later on, so it’s a good idea to set them up now.
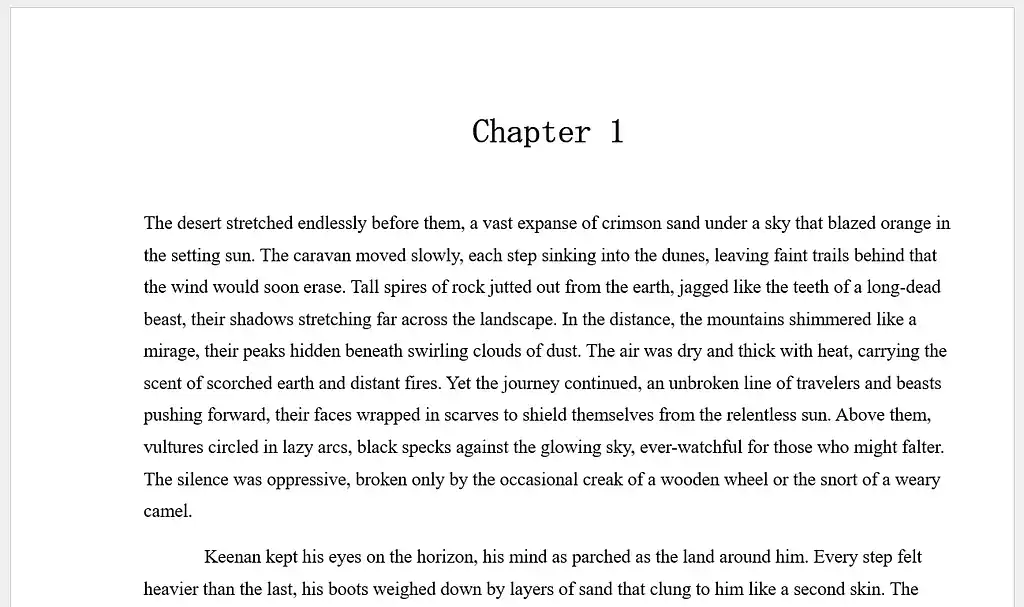
After formatting your heading, you can save it as a style to quickly apply it to future chapter headings. With the formatted heading still highlighted, go to:
Home > Styles > Drop-down menu > Create a Style
Give your style a name (e.g., "Chapter Heading") and click OK. Now, whenever you need to format a new chapter heading, simply highlight the heading text and apply your saved style by selecting it from the Styles group.
With all that out of the way, your manuscript is fully formatted and sorted into chapters. Now, you’ll just need to add some front matter to get it ready for publication, like your front cover.
4. Upload your front cover
Adding a beautiful book cover is a great way to tie your book together and get it looking professional. If you’re publishing an ebook, you’ll need to embed the front cover in the file you upload on your book retailer’s platform (e.g., Amazon KDP or IngramSpark).
To add your cover, place your cursor at the very beginning of the document. From there:
- Insert a Blank Page to create a page for you to add your cover;
- Return to the Insert tab, click Pictures, then select This Device and choose your cover image;
- Right-click the image, choose Size and Position, and manually enter the dimensions for width and height in the Size tab.
- Right click the image and select the small icon that appears near the top right corner (pictured below) and choose the Square option.
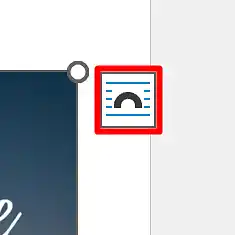
This is the icon you’re looking for.
With the image still selected, go to:
Picture Format > Arrange > Align Objects
Select both the Align Center and Align Middle options to center your cover.
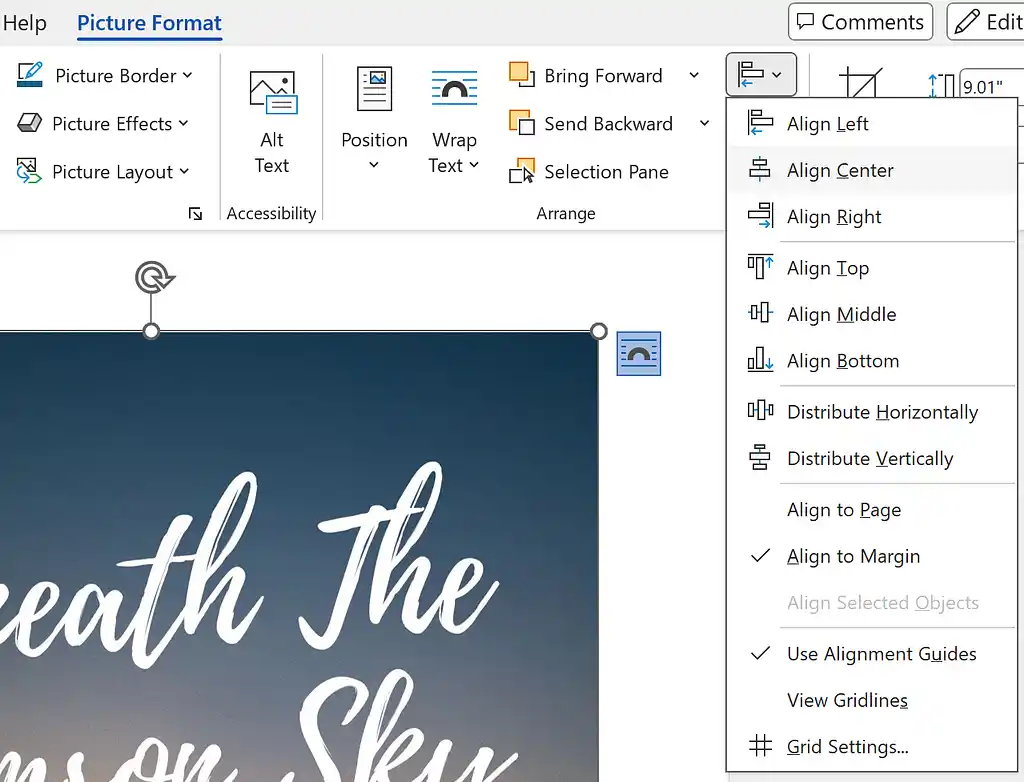
Your front matter doesn’t end there though — next, you’ll want to include your title, table of content, and copyright pages.
5. Insert the title, copyright, and table of content pages
The process for adding each of these sections is similar, so we’ll briefly cover each of them here.
Title page
A book’s title page should include two things: your name and the title of your book. Creating one is as straightforward as you would expect. To do so, you should:
- Start a blank page below your book cover page;
- Write your name and the book title on separate lines;
- Center both elements at the top of the page;
- Use the same font as the main text, but increase the size.

Copyright page
A book’s copyright page includes information such as the copyright notice (e.g., "© [Year] [Author's Name]"), the book’s ISBN, and any necessary disclaimers or credits you need to include. We have a detailed guide on how to make a copyright page, but here are some basic tips to get you started:
- Include your copyright page disclaimers;
- Match the font size to that of your manuscript and use italics;
- Use line breaks to separate each section;
- Center the text on the page.
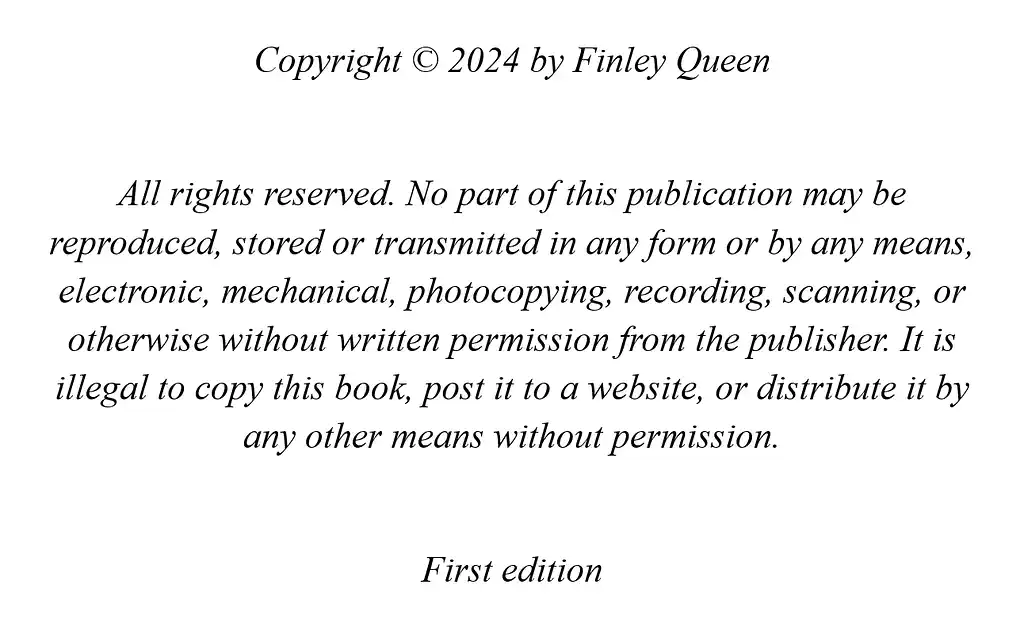
Table of contents
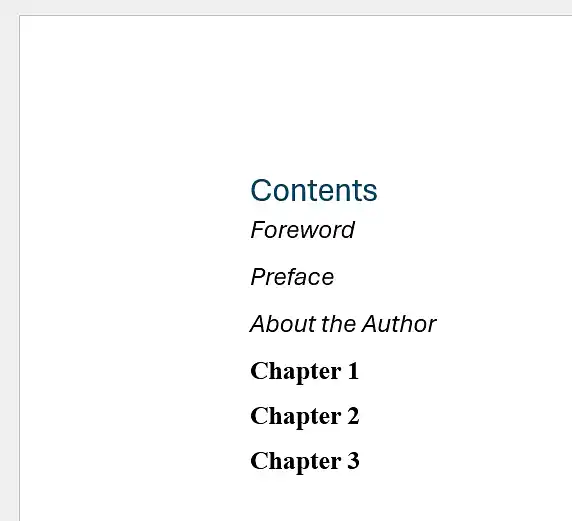
A table of contents (TOC) allows readers to navigate the different sections of your book with ease. If you set up each of your chapter titles as Heading 1 earlier on, then creating your TOC should be straightforward:
- Create a blank page after your Copyright Page;
- Place your cursor where you want the Table of Contents to be;
- Go to References, then click Table of Contents;
- Choose one of the automatic styles from the dropdown menu.
Click on the TOC, and select Custom Table of Contents from the dropdown menu, and customize it to your liking.
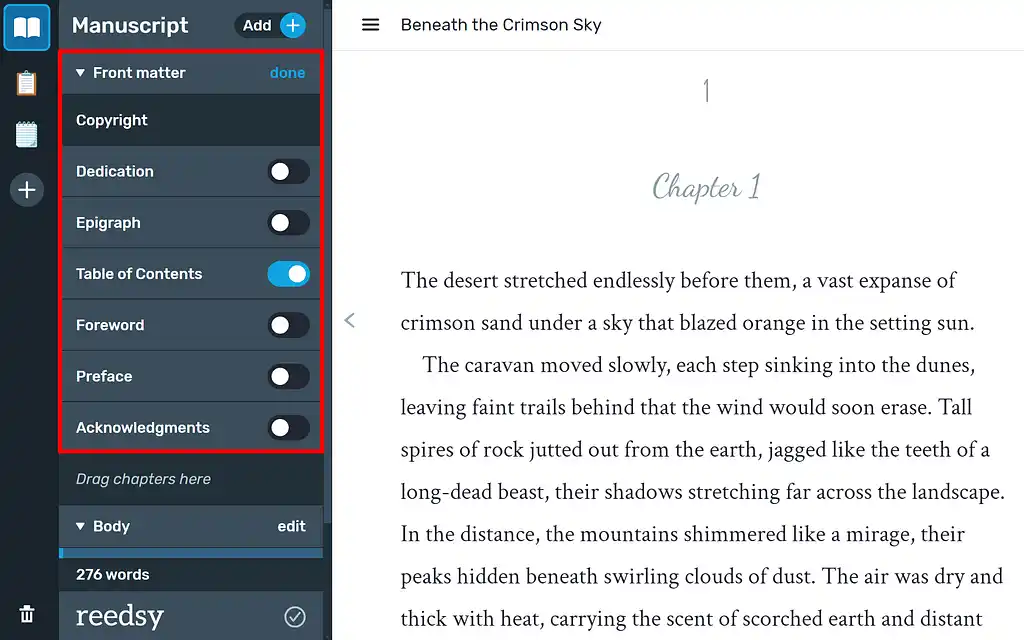
It's worth noting that with Reedsy's free book formatting software, Studio, you can streamline the process of assembling your front matter. With the convenient left panel, you can simply toggle on or off the elements you wish to include, then easily edit each section's content.
Now that your front matter is completed, you can set up your doc to automatically update the page numbers for the rest of your manuscript.
6. Automate your page numbers
While you’ll want readers to get lost in your story, you still want to add page numbers! Fortunately, you can automate the process without much hassle in Word. Just go to:
Insert > Header & Footer > Page Number > Format Page Numbers

From here, you can choose whether you want your page numbers to appear at the top or bottom of the page. You can exclude the front matter you created earlier by creating a section break before the first page where you want numbers to appear, then deselecting the “continue from previous section” option.
To create a section break, place your cursor where you want the break to start (such as after the copyright page). Then, go to:
Layout > Page Setup > Breaks > Section Breaks
Now, you can select which section break you want to use. Next Page starts a new section on the next page, Continuous starts a new section on the same page, and Even Page/Odd Page starts a new section on the next even or odd page.
Double-check that the header or footer for that section is unlinked from the previous one. Doing so will allow you to start your numbering where you need it without affecting any earlier pages. To exclude the cover from your automatic numbering:
- Double-click the header or footer on the cover page;
- In the Header & Footer Tools tab, select Options;
- Check the box for Different First Page.
Just one last step, and you’re good to go!
7. Export your book as a PDF
Exporting your book as a PDF is the final step before you can publish it. PDFs preserve your formatting across different devices and ensure that what you see is what your readers will see, regardless of their software or operating system. To export as a PDF, go to:
File > Export > Create PDF/XPS Document
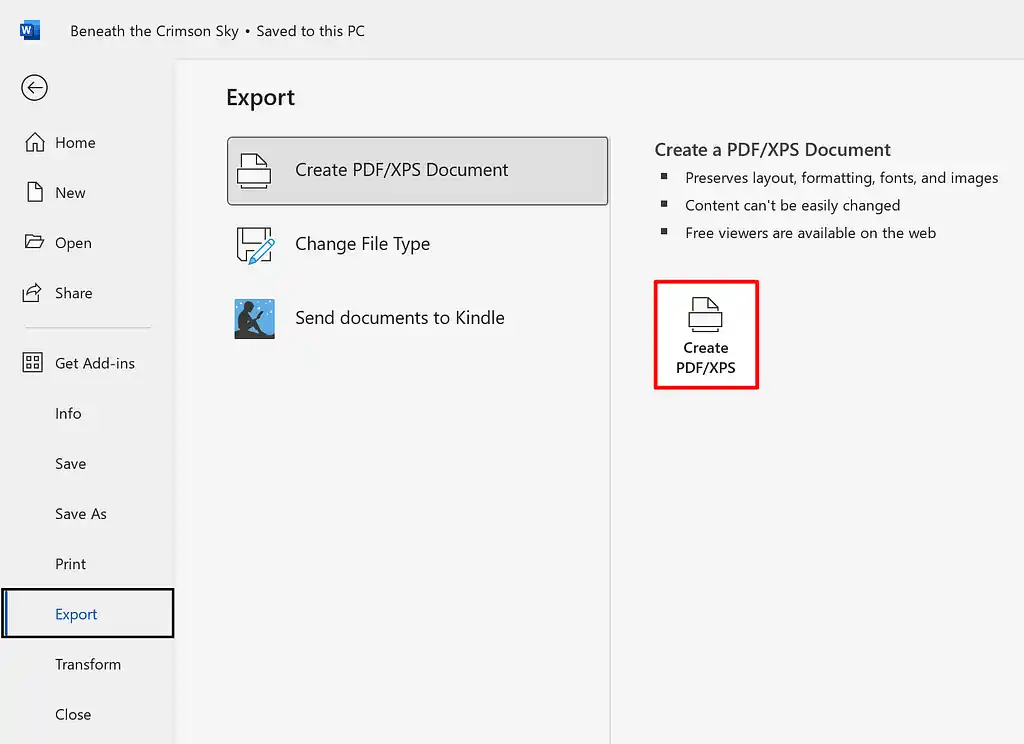
- To export your document as a PDF:
Click on the white “Create PDF/XPS” box on the right-hand side; - Select the option to optimize for standard to balance for quality and file size;
- Click Publish and you’re done!
You can make sure everything is up to standard by uploading your completed PDF to a platform like Amazon. While Microsoft Word is a reliable, if a little finicky, tool for formatting your book, you may want to give Reedsy Studio a try for a more streamlined and intuitive experience that can save you time and effort.
